Archive for November 8, 2012
Halloween – traffic light costume
0Last year, at the neighborhood Halloween party, one of the kids had dressed up as a traffic light. He simply wore all black, and he had three cardboard circles attached to his front. Audrey saw that boy’s costume and got to thinking… could we build one with real lights?
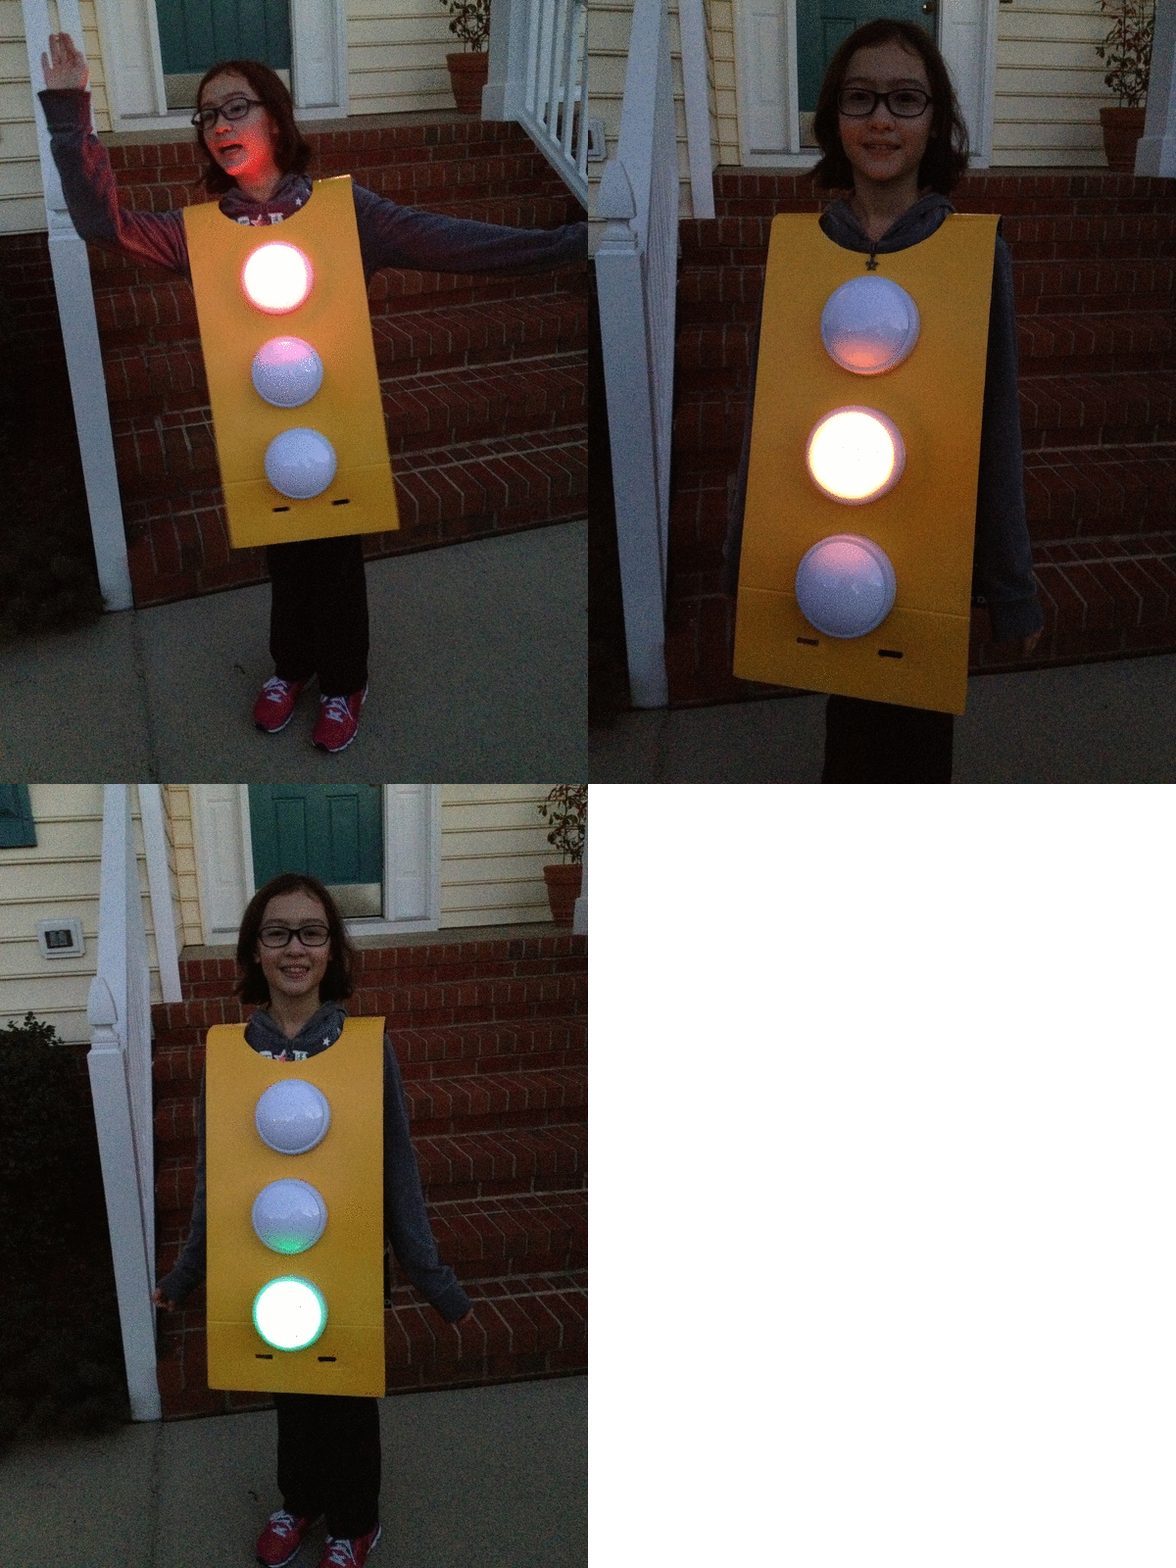
This is what we came up with.
Putting it together
We had the entire year to think about it. Sometime in the summer, we actually started planning. I knew that we could do the controls, but I was not so confident about the power or how to drive several LEDs.
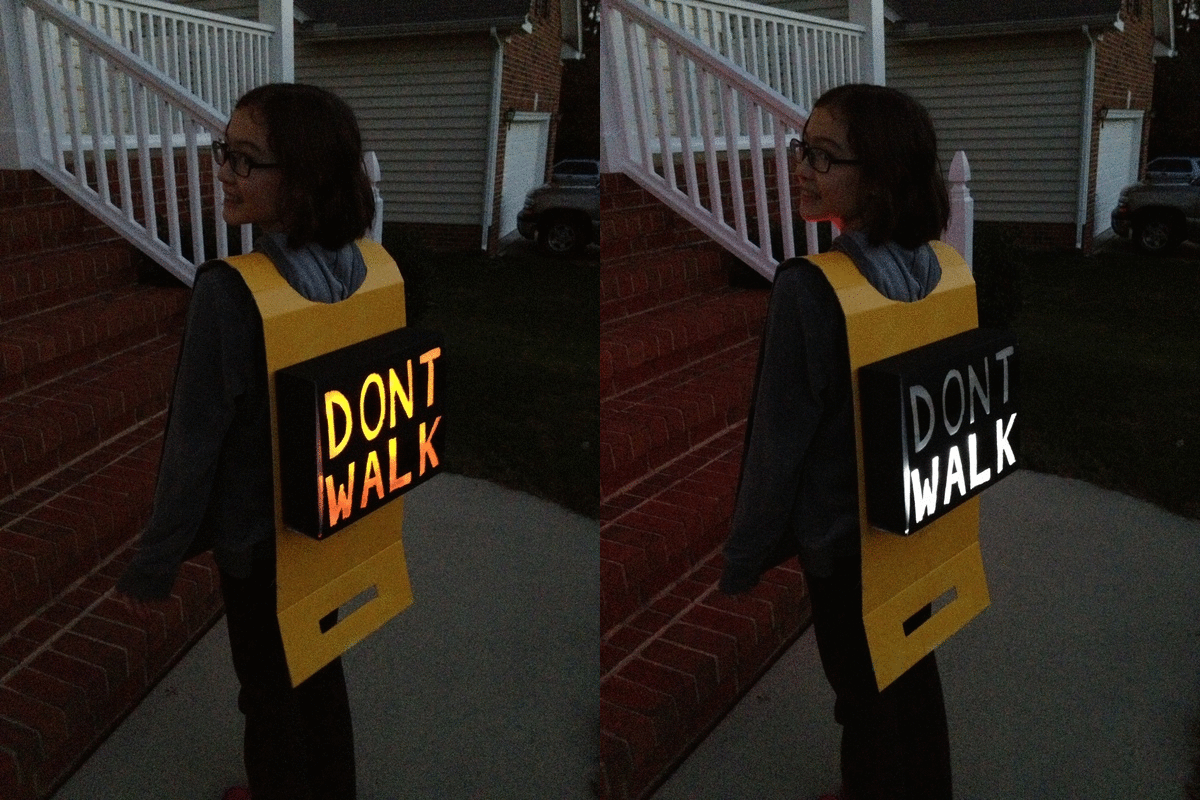
The controller was easy. We have been using Arduinos for several projects, and I had ordered a few “nano” boards, which are about the size of a stick of gum. We plugged one into a solderless prototyping board. We used five of the Arduino’s outputs for our five lights: red, yellow, green, “WALK” (white) and “DONT WALK” (orange). We ordered super-bright colored LEDs from DealExtreme in Hong Kong.
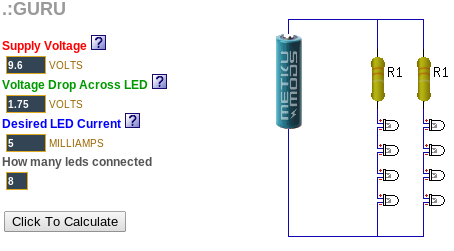
The hard part was figuring out how to power several LEDs at the same time. I discovered a web site called “ledcalc.com” that showed us how to arrange the LEDs in several serial strings wired to each other in parallel. And after taking a few measurements, we figure out what the voltage drop on each LED was and we estimated how much current to push through each LED. This suggested that we should use a higher voltage than I normally would use to just power the Arduino. We chose 8 NiMH rechargeable AA batteries for 9.6 volts.
The LED calculator suggested that for red, yellow and orange, we should plug the LEDs in strings of 4 with a small resistor at the end. We wanted 8 LEDs for each color, so that meant we’d plug two strings of 4 LEDs together in parallel.
Since the “forward voltage” (voltage drop) across the white and green LEDs was higher, we ended up using strings of 3 LEDs for those. Fortunately, they were so bright that the fewer LEDs made no difference in overall brightness.
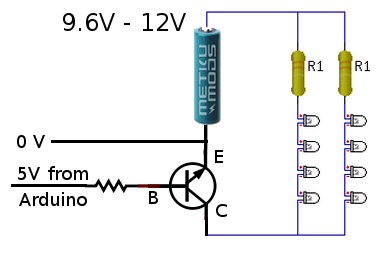
Now came the tricky part. We wanted the LEDs to run at 9.6 volts, but the Arduino runs at 5 volts. That meant we needed to use a transistor on each output to switch the higher-voltage LED strings on and off. We were able to figure out how to do this by looking at an Arduino experiment book. Below, you can see how one 5V output line from the Arduino can be used to switch 9.6V through a bank of LEDs.
During our tests, we found that after a while (a pretty long while), the white and green LEDs got very dim while the others stayed normal brightness. We decided that the battery had drained and the voltage had dropped just enough to make driving the three higher-voltage LEDs too hard. Doing a little bit of back-of-the-napkin math tells why. The white and green LEDs each have a 2.5V drop… times three LEDs and that means you have to have at least 7.5V to run them at all in series. The other color LEDs each dropped 1.75V, for a total of 7.0V. That means the white and green lights will poop out 0.5V earlier than the other colors will.
As a quick fix, we replaced the 1.2 volt NiMH rechargeable batteries with 1.5 volt alkaline batteries, making our total supply voltage a bit higher, a full 12 volts. This kept all of the LEDs bright all night. A quick estimate suggested we might get two or more DAYS worth of operation from a single set of batteries. But after watching them dim earlier, I decided to take a spare set of batteries with us while we went trick-or-treating, and I kept a close eye on the white and green LED brightness.
The big night
Halloween was a big hit. Everyone got a chuckle out of the costume, especially when Audrey turned around and they could see the WALK and DONT WALK signs.
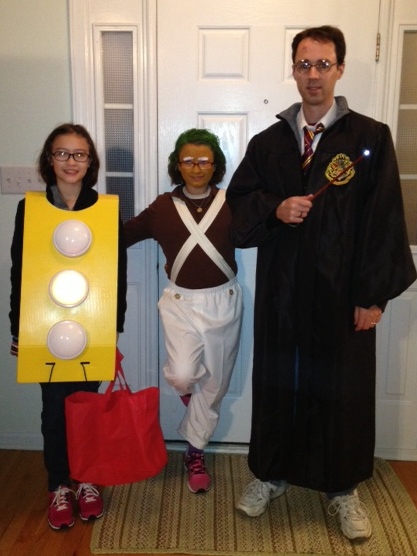
Here is a photo of the Audrey in her stop light costume, Syndey as an Oompa Loompa and me as Harry Potter.
