Random Thoughts inside Alan's head
Posts by alan
idea: spectral shift hearing aids
2This is part of a series I have been thinking about for a long time. When I have a fleeting thought about some neat idea, I should publish it to ensure that it can not be patented later.
I saw an ad for hearing aids, and that made me wonder if instead of simply amplifying, hearing aids could do some more sophisticated sound transforms. Maybe they do already.
Since hearing loss is typically non-uniform across the hearing spectrum, it would make sense to transpose sounds from “bad” ranges to “good” ranges. Of course, in practice, that might sound weird. For example, someone with high-frequency hearing loss might have high-pitched consonant sounds transposed to a lower end of the spectrum. I’m sure the listener would have to adjust to that, since we’re used to vowels sounding low and consonants sounding high.
idea: car sobriety switch
0This is part of a series I have been thinking about for a long time. When I have a fleeting thought about some neat idea, I should publish it to ensure that it can not be patented later.
This morning I read an article about a drunk driver that killed a motorcyclist. I know there are companies that make sobriety tests that tie into vehicle ignition systems. Some courts order offenders to have these installed.
I thought it would make sense to use the car’s existing controls (buttons on the steering wheel) and displays to run a reaction-time test that has to be passed before the car can be started.
Of course, this would be annoying. So maybe the car could be configured (via web page?) to require this test only at certain times. I log into car.com and set it to require a sobriety test to be started between 10pm and 4am. It could provide options if I fail. Say, after two failures, the car could phone a friend, or it could (via a service like OnStar) call a cab to my location.
First Performance
0
This weekend was a first for me. I performed a simple ukulele song on a stage with an audience. The song was “Princess Poopooly” and the venue was the C.F.Martin guitar company tent at the IBMA World of Bluegrass street festival.

I’ll admit, “Princess Poopooly” is not a bluegrass song… it’s a silly Hawaiian tune. But the kind folks at the Martin tent invited any and all to come up on stage and show their stuff. Play a song, get a T-shirt.
The performance itself was underwhelming. I’ve never worked with mics before, so it was a little constraining to sit behind two: one for me and one for my ukulele. Halfway through my song, the uke mic dropped out of the stand and into my lap, which led to the most-remembered line of my act: “whoops!” The kids laughed and repeated that one over and over.
This was the realization of a promise I made to myself at last year’s World of Bluegrass festival. After watching a bunch of other folks step up and play (including both of my daughters), I decided that it was time to pick up an instrument myself and learn.
Big thanks to the folks in the audience who cheered me on.
iFamily
0
12 years
Like many families, we have accumulated several iPhones and iPods over the years. My wife and I have new iPhones, and we upgrade every so often, and our kids inherit our older phones. So we’ve encountered that age-old question: how should we manage the Apple IDs for all of these devices?
At first, we followed the simple approach — just leave the older devices associated with our Apple IDs. It makes some things easier. For example, the kids don’t have to re-buy the games that you bought over the last few years.
But when you share Apple IDs for all services, things get weird quickly. I started seeing my daughter’s iMessage conversations on my phone. If anyone in the family changed an account setting on any of the apps that use Apple IDs, we’d get a flood of notifications about the change, and the change would usually propagate to the other devices against our intentions. It felt like a very unstable equilibrium. Just as I’d get everything working right, something would upset the balance.
The thing that finally persuaded me to look at alternative setups was when I tried to set up “Find My Friends” so we could see where the others were. It did not want to let me track my daughter, because it thought she and I were the same user.
So I read a few discussions and articles about the different strategies for setting up Apple IDs for a family. They explained how Apple IDs work, and showed how to manage them. Some highlights:
- Creating an E-mail Account and Apple ID for your Child – Apple IDs are simple
- Moving from a shared iCloud to individual accounts – How to change your iCloud account on the phone
- Multiple Apple IDs and iOS devices in a Family – Simple list of Apple ID services (the basis for my bullet list below)
- How many Apple IDs should your family have? – Detailed list of services that use Apple IDs
OUR FAMILY’S STRATEGY
Everyone in our family now has a unique email address and their own Apple ID. My Apple ID is associated with a credit card, but theirs are just simple accounts. These can easily be set up at http://appleid.apple.com/.
Technically, since the kids are young, I have an Apple ID that they use. The contact info is mine. But the point is that each person has a unique identifier for their devices, and each one is tied to a unique email address.
The key to making this work is this sometimes-overlooked fact about how the Apple ecosystem works: a single device can use different Apple IDs for different purposes.
So in our family:
- iTunes Store – use Daddy’s ID
- iMessage – use your own
- FaceTime – use your own
- iCloud* – use your own
- Game Center – use your own
Note that iCloud is a biggie. It includes Mail, Contacts, Calendars, Reminders, Safari, Find My iPhone, Documents and Data, Photo Stream and Backups.
I’m not really sure how the iCloud Mail and Calendar stuff works, because we don’t use them. I host my own mail and calendar services on a Linux server, and that stuff works great with the iPhones. We have separate email addresses on several domains. And we have some shared calendars and some individual calendars.
Our family’s new setup puts some sanity back in the system. I know that my iMessages will only show up on my phone and Mac. I can call my kids using FaceTime without it getting confused, trying to call myself. I see my contacts, and my kids don’t. But we each get to use the games and other apps that we have bought as a family. And we can each use “Find my Friends” to keep track of where everyone is.
A WORD ABOUT EMAIL ADDRESSES VS APPLE IDS
I’m going to dive just a little deeper here, because I discovered something else in the transition that might help someone else.
Since I run my own mail server, I tend to use very specialized addresses for any kind of service that I sign up for. That way, I can sort all of my bills into a “bills” folder that I don’t have to see until it’s time to pay bills. Or if one vendor starts sending me too much junk, I can remove that one email address/alias and that stuff disappears forever.
Following this strategy, our Apple IDs are actually specially-made alias addresses in the form itunes-(name)@(ourdomain).com. But since we want to use our real email addresses for stuff like FaceTime and iMessage, we need to associate our real email addresses with these new Apple IDs. On that appleid.apple.com site, there’s a little form where you can associate all of your other email addresses to the Apple ID.
However, since we were migrating from a single Apple ID, I had to remove the kids’ preferred email addresses from my Apple ID before it would let me add them to their Apple IDs. This is very easily done on the appleid.apple.com site. However, if you just try to add the email address to the new Apple ID directly using the phone menus, it just sits there with a spinny star saying “verifying”, and it never actually sends the verification email.
So my advice is to manage your Apple IDs using the web site, http://appleid.apple.com/.
dnsmasq + unbound
1
12 years
Recently, our local Linux Users Group was talking about DNS servers. Some folks in the group claimed that their ISP’s DNS servers were very slow.
In a group like this, there is usually a camp that are strong supporters of running BIND. Somehow, I have never been able to wrap my head around BIND. Instead, I have been using dnsmasq. These two packages are very different.
BIND
BIND is a fully recursive DNS resolver. When you look up a name like “www.cnn.com”, it goes to “com” to ask who “cnn” is, and then it goes to “cnn.com” to ask who “www.cnn.com” is. BIND has a steep learning curve, and that has always discouraged me from really tinkering with it. It also misses a very important point that my home network needs — local name resolution of DHCP-assigned addresses.
dnsmasq
Dnsmasq is more of a caching DNS server for a local network. It has a built-in DHCP server, so devices on my home network get their addresses from dnsmasq. When I make a DNS request, dnsmasq looks in its local DHCP table first. For example, if I want to talk to another device in the same room, like a Roku or a printer, dnsmasq knows the addresses of the local devices and it responds immediately. If the request is not a local name, it simply passes on the request to some other name server… maybe your ISP’s, or maybe a free server like OpenDNS or Google’s 8.8.8.8. Dnsmasq caches all DNS requests, so if you make repeated requests to the same site, they are answered pretty quickly.
I really like dnsmasq.
It is super flexible, and you configure it through a single configuration file which is super easy to understand. In fact, many home routers use dnsmasq under the hood.
unbound
But during the discussion in our LUG, someone mentioned unbound, another fully recursive DNS server that is super easy to set up. So I had to try it out. It did not disappoint.
My Setup
So how do these two tools work together?
Actually, it’s quite elegant. Dnsmasq listens on port 53 of all addresses on my router. It is the primary DNS server for all machines on my local network. If the request is for a local device, then it fills the request immediately. But if the request is for some site on the internet, then it passes the request off to unbound, which is also running on the router, but listening on a different address/port combination.
Here is how I configured dnsmasq.
/etc/dnsmasq.conf
# --- DNS ----------------------------

# Be a good netizen, keep local stuff local.
domain-needed
bogus-priv
filterwin2k

# Do not listen on "all" interfaces and just filter.
bind-interfaces
# Listen on port 53 on in-home network (eth1) and localhost (lo).
# Do not listen on internet interface (eth0).
interface=lo
interface=eth1

# Upstream servers are not listed in resolv.conf, they are listed here.
no-resolv
server=127.0.0.1#10053 # unbound

# Add this domain to all simple names in the hosts file.
# (Also sets the domain (15) option for DHCP).
expand-hosts
domain=home.alanporter.com

# Special treatments for some domains and hosts.
local=/local/ # dnsmasq handles these itself
server=/alanporter.com/69.93.127.10 # look up via ns1.linode.com
address=/doubleclick.net/127.0.0.1 # return this address immediately
address=/sentosa.us/108.161.130.139 # return this address immediately
cname=oldname.home.alanporter.com,newname.home.alanporter.com

# Logging
log-queries
log-facility=local1

# Caching
cache-size=1000

# --- DHCP ---------------------------

dhcp-range=FunkyNet,172.31.1.100,172.31.1.199,10m
dhcp-option=FunkyNet,1,255.255.255.0 # subnet mask - 1
dhcp-option=FunkyNet,3,172.31.1.1 # default router - 3
dhcp-option=FunkyNet,6,172.31.1.1 # DNS server - 6
dhcp-option=FunkyNet,15,home.alanporter.com # domain name - 15
dhcp-option=FunkyNet,28,172.31.1.255 # broadcast address - 28

dhcp-leasefile=/var/lib/dnsmasq.leases
read-ethers

# reserved names and addresses
dhcp-host=d8:5d:4c:93:32:41,chumby
dhcp-host=00:50:43:00:02:02,sheeva,172.31.1.3,10m

# --- PXE ----------------------------

dhcp-boot=pxelinux.0,bender,172.31.1.1
So dnsmasq listens on the local network for requests, answers what it can: local DHCP addresses, cached addresses and special overrides from the config file. And anything it can’t handle itself, it sends on upstream to unbound.
/etc/unbound/unbound.conf
server:
    # perform cryptographic DNSSEC validation using the root trust anchor.
    auto-trust-anchor-file: "/var/lib/unbound/root.key"
    # listen on local network, allow local network access
    interface: 127.0.0.1
    access-control: 127.0.0.0/8 allow
    # NOT listening on IPv6
    # interface: ::1
    # access-control: ::1 allow
    port: 10053
    # logging
    chroot: ""
    logfile: "/var/log/unbound.log"
    log-time-ascii: yes
    log-queries: yes
    verbosity: 2
As you can see, unbound does not require much configuration.
Notice that I am NOT listening on the IPv6 interface. It turns out, there is no need. Dnsmasq listens on both, and it forwards A requests and AAAA requests to unbound over an IPv4 connection on the local “lo” adaptor.
How it stacks up
So how well does this setup work? Are there advantages or disadvantages to using dnsmasq and unbound together?
Disadvantages
I tested this setup using “namebench“, a Google “20 percent” project that measures DNS lookup times. It told me that Google’s public DNS (8.8.8.8) was 250% faster than my in-home DNS. Furthermore, it said I would be better off using my ISP’s DNS servers. I am guessing that this is because these larger DNS servers cache a much larger pool of addresses, bypassing full recursive lookups of most common names.
Advantages of dnsmasq + unbound
If my setup is slower than using a single upstream DNS, then why should I run mine this way? I have a few reasons.
- First and foremost, I learn a lot about DNS this way.
- But also worth considering, ISP nameservers are notoriously flaky. Just because the ISP beat my nameserver on a single test, that does not mean it will always do so. That’s like comparing the bus to driving your own car… it might be better sometimes, but really bad other times.
- One compelling reason to run a recursive DNS server like unbound is that you know you’re getting the right answer. When you use an ISP’s DNS server, they may hijack some domains and give you an incorrect answer on purpose. For example, they may censor content, and return a bogus landing page address for addresses that are on their black list. OpenDNS touts this as a feature… it is more “family-friendly” than raw DNS.
- If you’re the tinfoil hat type, you might not want to use a DNS service from someone like Google, who makes their money from knowing more about your browsing habits than you do. Or from your ISP, who is always trying to up-sell you with something.
Advantages of dnsmasq + any upstream DNS
- Dnsmasq (whether I use an upstream DNS or unbound) gives me control over how stuff is looked up. For example, when I was working on a new web site, I could tell dnsmasq to use the hosting company’s DNS for that one domain, so I did not have to wait for caches to expire between me and the host.
- Dnsmasq caches lookups. Actually, unbound does, too. I am still playing with both.
- Dnsmasq make switching DNS providers really easy. Say your ISP’s nameservers are acting up… just change one line in dnsmasq.conf and start getting results from somewhere else.
Pogo Plug v4 + Flashback
1
12 years
A timely discovery
I have been interested in automated backups of computer data since the mid 90’s, when I had a very well-timed hard disk failure. By pure chance, I had been working on a script that would copy my “important files” from my hard disk to a 100MB “Zip Drive”. I finished my script after testing it several times, and then I went to bed. The next morning, I woke up to find that my hard disk had crashed. Fortunately, I had a very recent backup!
I have often marveled at how easy it would be to lose invaluable files in a single mishap… countless memories, photos, financial records and project work. Backups are important.
BackupPC
When I worked at “the oven place” (TMIO), I was tasked with evaluating backup schemes for their factory and office PC’s. So I looked at several open source packages, with emphasis on being server-centric and automatic. That is, the backup server would decide when to make the backups, and the employees would never have to remember to do anything special. Any process that relies on a human to remember to kick it off is destined to be run once-a-year.
We ended up choosing “BackupPC“, which runs on a modest server with a large storage disk. It would wake up every so often and run through its list of clients and pick one to back up.
For several years, I ran BackupPC at home, too. At first, I ran it on a discarded PC. But later, I migrated to low-power fanless embedded boards.
Flashback
In 2013, I decided that BackupPC was taking too long to make backups. I would bring my laptop home from work and turn it on, and BackupPC would notice it and start backing it up. But the backups were taking so long that they would still be running when I was ready to leave for work the next morning! I ran a few tests with rsync to see if the problem was with BackupPC or the file compression or their crazy idea of how “incremental backups” should work. So I wrote what started out to be a speed test, and then a wrapper around “rsback”, and finally a very minimal python script that I named “Flashback“. “Flash” because it’s fast. My laptop backup, which was taking all night using BackupPC, usually completes in a half hour or less.
You can find Flashback on github.
The Pogo Plug v4
 This week, I tried out a new hardware gadget called a Pogo Plug. It is a very close cousin to the SheevaPlug, an embedded Linux board which I had been BackupPC and Flashback on. What caught my attention about the Pogo Plug v4 was:
- It has two USB3 ports.
- It has gigabit ethernet.
- It was on sale for just $20.
The only bad part is that it only has 128MB of RAM… that’s only a quarter of what the SheevaPlug has. But I am not really using the memory for anything. I am just running rsync.
I did not spend any time using the stock firmware. Instead, I immediate enabled SSH and then followed these instructions for installing Arch Linux on a USB stick, which I plugged into the top plug (the bootable USB2 one). I plugged the 1-terabyte USB2 hard disk into the back of the Pogo Plug.
Then I installed Flashback and I modified the monitor script to take advantage of the three-color LED on the front (green for sleeping, yellow for backing up, red for error).
It’s been running for about a week now, and I think it has proven itself worthy.
I’d like to try it with a USB3 hard disk, and see if it’s any faster.
IPv6 + SSL
0
12 years
by alan
in geeky stuff on 2014-02-23
My entire web site, including this blog, now supports IPv6 and SSL/HTTPS.
| protocol | Normal HTTP | Encrypted HTTPS |
| IPv4 | http://ipv4.alanporter.com/ | https://ipv4.alanporter.com/ |
| IPv6 | http://ipv6.alanporter.com/ | https://ipv6.alanporter.com/ |
You don’t have to include the ipv4 or ipv6 prefix… that’s just to force it to use one or the other. The main “alanporter.com” URL works just fine. If your computer has an IPv6 address, your browser should use IPv6. If not, it will fall back to IPv4.
If you’re interested in knowing which IP stack you are using, I recommend IPvFox and IPvFoo browser plug-ins. They show a red “4” or a green “6” in the browser address bar so you’ll know which IP stack you are using.
Some portions of this web site, like the photo gallery and this blog do not have IPv4-specific and IPv6-specific addresses. But just like the main URL, selecting a protocol stack should be automatic.
You might wonder why you get a warning when loading the pages with SSL/HTTPS. I did not send my web site certificates off to Thawte or GoDaddy or Verisign to be signed… I am too cheap for that. Instead, I signed them using my own certificate authority. If you import this CA certificate into your browser, all of my site’s certificates will be considered valid.
If you are security-minded, and you do decide to import my CA certificate, you’ll probably want to make sure that the SHA1 fingerprint is correct.
It should be AD:30:DA:F8:EA:03:A9:D5:E4:33:F4:30:F6:9C:FC:91:8A:D0:6B:06.
IPv6 at home
0
12 years
by alan
in geeky stuff on 2014-02-15
History
I’ve been running an IPv6 tunnel at home since 2010. Why? Several reasons. I’d like to use IPv6 enough that I feel comfortable with it. I’d also like to encourage service providers and web sites to start incorporating it, rather than playing funny games to extend IPv4. And finally, I am convinced that pretty soon, there will be desirable services on the web that are only available on IPv6… so far I have not heard of a killer app that is not accessible on IPv4, but it will come.
For all of this time, I have been running a tunnel from my home router to Hurricane Electric, a leading provider of IPv6 services. They use a system called “6in4”, which bundles up your IPv6 packets inside IP packets of type “protocol 41”. Most folks are familiar with TCP (6), UDP (17), ICMP (1), or maybe even SCTP (132). Well there are a lot of other types of IP packets, and protocol 41 is used to bundle IPv6 traffic inside of IPv4 packets.
The thing is, to get a 6in4 tunnel to work, you have to tell your router to allow IP protocol 41 packets through. Most routers do not do this by default.
Outage
This weekend, we had an internet outage at home. So I rigged up my router at home to connect to the internet through my neighbor’s wifi instead of through our DSL modem (this is pretty easy to do with an old WRT54G router, re-flashed with “dd-wrt” firmware). The problem is that I don’t really have any control over my neighbor’s router, and it does not pass these protocol 41 packets through. So my IPv6 quit working.
That, by itself, would not be so bad. The traditional IPv4 network still works OK. But since my home network DOES have IPv6, my web browser expects to be able to make IPv6 connections. So when I go to a web site like google.com, my browser first tries an IPv6 connection to Google. After several seconds, that attempt times out and then the browser tries an IPv4 connection. Multiply by every HTTP request, and it starts feeling dreadfully slow.
If you’re curious whether your normal browser is using IPv4 or IPv6, there is a cool browser plugin for Firefox called “IPvFox”, and one for Chrome called “IPvFoo”, that will show a “4” or “6” in the address bar. Sometimes, it will show a combination, if the web page content is coming from a mixture of sources.
I wanted to see if there was a way to get IPv6 to my home network, even when I am sitting behind my neighbor’s router.
Gogo6 / Freenet6
I dug around a little, and I found that there are other tunnel brokers that use different schemes of encoding their IPv6 packets and ferrying them to their point of presence. I found one called “Freenet6” that uses a scheme called TSP (on a TCP/IPv4 socket) to get things up and running, and then it encapsulates the IPv6 packets inside UDP/IPv4 packets. This means you can use Freenet6 when you are behind a more restrictive router like your neighbor’s, or at a hotel or a conference).
Freenet6 was not too hard to set up, but it was confusing and a bit annoying.
First, TSP needs a software client on your router. You can download one client from the Freenet6 web site. But I dislike running someone else’s client software as root on my systems. So instead I used the open source “gogoc” that is packaged for Debian.
Second, when you first connect, it might complain about keys, because you’re connecting to “authenticated.freenet6.net”, but you end up talking to “montreal.freenet6.net”. You can get around that my setting CHECK_KEYFILE=”no” in /etc/default/gogoc. I’ll want to revisit this later after things are up and running.
Third, I had a hard time authenticating. After trying many things, I discovered that there are TWO unrelated usernames and passwords that you’ll need.
- The first username/password is for the gogo6 web site. Your username there will be your email address. This is only used for the web site and forums.
- The second username/password is actually used by the gogoc client. To get this, you have to sign up for a Freenet6 Pro account. This account is free, but you have to send an endorsement on Twitter to get it… and this is done in the most annoying way. You click on “Pay with a Tweet or Facebook”, which takes you to a site called paywithapost.de. It wants you to grant access to their Twitter app called “Pay with a Tweet Social Payments”. That’s right… not only do you have to tweet, but you have to install a Twitter app that has access to your account. I used a special “shill” account that I have for just this sort of thing, and then I immediately revoked access to that app.
So, configuration and annoyances behind us, I was able to run the open source “gogoc” client, and it assigned an IPv6 address to my router (which advertised it to the other computers in my house), and now my entire home network has IPv6 access again.
I am looking forward to trying Freenet6, and seeing how it compares to the Hurricane Electric tunnel that I am used to.
I’d also like to shout out to my neighbor, who was nice enough to let us mooch off of his internet service until AT&T gets their act together.
The obstinate trash man
3
12 years
This weekend’s pet project was to set up Ubuntu Studio to run on my Macbook Pro.
Ubuntu Studio is a Linux distribution, based on Ubuntu, that comes with lots of audio and video software installed and configured. I have been wanted to play with Ardour, an open source digital audio workstation, and although it will run on a Mac, it runs much better on Linux. So I downloaded and burned a copy of the Ubuntu Studio “Live DVD”. This would allow me to test drive Ubuntu Studio on the Macbook without installing anything on the Macbook’s hard disk. It worked wonderfully, and so I decided to make a bootable “Live USB” stick as well. The Live USB stick acts just like the Live DVD, except it also allows you to save files back to the USB stick (obviously, you can’t save files to a read-only DVD). So I would be able to do my studio work in Linux and save my work when I reboot back into OSX.
I was greeted with a very weird bug in Ubuntu Studio’s desktop system. Whenever I tried to delete a file, I would get the following error:
Unable to find or create trash directory
What a weird error message!
Ubuntu Studio uses the XFCE desktop environment, which follows the Free Desktop’s “Desktop Trash Can Specification“. Yes, there are people who write specifications about how trash cans are supposed to work. There is a utility called “gvfs-trash” that actually handles moving deleted files to the appropriate trash can area. You can run this command from a shell prompt.
$ gvfs-trash somefile
Error trashing file: Unable to find or create trash directory
There’s that same error message.
I ran the same command with “strace” to figure out what it was doing, and I did a little bit of Googling. I found this blog post, which told me most of what I needed.
The gvfs-trash system wanted to find a directory called “.Trash-999” in the top level of the filesystem. It wanted 999 because my user ID number was 999 (run the “id” command to see what your user ID number is). Inside the /.Trash-999 folder, it also wanted two sub-folders named “files” and “info”. All three of these needed to have 700 permissions.
Here’s a one-liner that will do it all:
u=$(id -u) ; g=$(id -g) ; sudo mkdir -m700 /.Trash-$u ; sudo chown $u:$g /.Trash-$u ; mkdir -m700 /.Trash-$u/{files,info}After that, the desktop system could remove files OK, and the gvfs-trash command could as well.
That gvfs-trash command might make a good alias!
alias rm='gvfs-trash'Beijing
0In August, I went on a business trip to Beijing. Our company has a group over there that is adapting our product for the Chinese market, and they were running a trial at one of the mobile phone carriers’ lab. We decided that we should send a couple of engineers over to help out, since they would be accessing data from the system that was designed here in the US.
GETTING THERE – The Visa Adventure
The original plan was for me to leave immediately and stay for two weeks. However, China requires a visa, and my last visa had expired six months ago. So I delayed my trip by a week and shortened it to a single week, while I collected all of the paperwork from my company and sent it off to a company that specializes in getting visas. Less than 48 hours before my flight was supposed to leave, I still had not heard back from the visa company, so I called them to check on it… you know, get a FedEx tracking number, etc. Nope! It turns out that the visa company still had not submitted my paperwork to the Chinese embassy! They said I had two choices: submit it then and wait two days (which would mean missing the lab trial entirely) or go to Washington DC and walk it through myself.
This was Thursday night, and I was expecting to leave home at a “civilized” time of 10am on Saturday. I was not fully packed. My kids were planning to spend Thursday night and Friday night playing with me at the pool, and then they could send me off on Saturday. Instead, I changed my flight plan to leave on the very next flight to Washington, 6am Friday morning. Suddenly, I had to pack, try to sleep a little, and then sneak out of the house at 4:30am. I’d miss my last day and a half with my kids, and they were not pleased.
I made it to Washington, and I went to the passport company to retrieve my passport. They actually charged me a cancellation fee, but instead of ripping them a new one, I decided to use that precious time to get my visa.
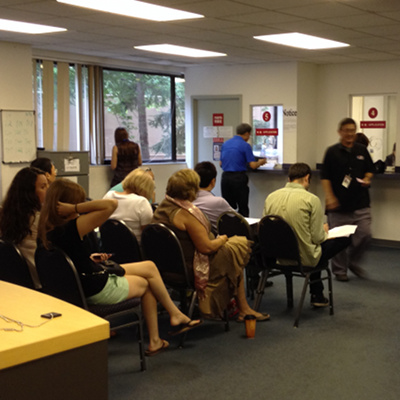
When I got to the Chinese embassy, I waited in line only for the lady at the counter to tell me “sorry, no same-day service!”. I was furious. Not only did the visa company NOT do their job, but they fed me bad information about how I could remedy the situation!
I decided to get back in line, hope for a different counter clerk, and practice my story. When it was my turn, I slowly explained that I had sent my paperwork in more than a week ago, and through no fault of my own, it never made it to their office. She explained their policy of no-same-day service, but this time, I was ready for it. I asked if I could “appeal to the consulate to consider my story” (remember that phrase, it’s a good one). So the lady took my papers to the back office and I waited. She came back and said that they did not believe my story. I was shocked at her choice of words. But I stayed cool. Fortunately, I had made copies of EVERYTHING, and so I pulled out a copy of my FedEx waybill and the receipt from when I had dropped the package off at the FedEx office at RDU airport. It showed TO and FROM and a date. She went back in the back and came back to tell me to return in three hours to pick up my passport and visa.
With my passport in my pocket, I was free to explore Washington DC for the afternoon. I stayed in DC overnight and got on my original scheduled flight the next day.
IN BEIJING – A Dog’s Life
 The trip to Beijing was uneventful, and we arrived at the very nice Crowne Plaza hotel. Every morning, we were greeted by the beautiful Chinese hostess, and then treated to a buffet that was a confluence of breakfast foods from every continent.
Our hotel was on a popular pedestrian street called WangFuJing (王府井). This was not the place to see how the locals live. This place was a magnet for tourists from all over China and beyond. The streets were lined with a combination of tourist shops selling souvenirs and stereotypical Chinese stuff, as well as big-name stores like Swarovski and Rolex. The Apple Store is on that strip, too. The pulse of WangFuJing reminded me of the NC State Fair, with crowds of visitors and shops selling crazy foods that no one would eat if they were at home.
 Each day, we’d take a taxi to the customer’s office, and we’d go through this routine of signing in, getting a pass, walking to the lab, giving our pass to the guard, going upstairs, exchanging our work ID badge for a guest badge with a locker key, telling the receptionist our laptop serial number, and locking everything except our laptops in a locker.
Inside the lab, our company’s workers and the contractors were busy making changes to their Chinese adaptation of our product. But I could not help the for three reasons: (1) it ran in Internet Explorer only, and I had a Mac (2) it was written in Java, a language that I am not familiar with (3) the entire user interface was in Chinese. So we fell into a pattern where they would work in Chinese until they reached a problem with our product, then they would switch to English to ask me a question.
So I spent most of my day the way a dog would. I sat there, watching them talk, but not understanding a word. Sometimes I would hear a single word that I understood, and it would catch my attention. Sometimes, they would get up suddenly and say they’re heading out for lunch, and I would leap up and follow them out the door. A dog’s life.
SENSORY DEPRIVATION AND OVERLOAD
So during the daytime, I experienced a sort of sensory deprivation in the lab. I did not know what anyone was talking about, and so I did not have a good idea of how the trial was going (fortunately, my colleague spoke Chinese natively, and he produced a daily summary report for our bosses back home). Rather than totally “plugging in” to their project, I simply answered technical questions as they came up.
Sensory deprivation.
 At lunch time, we’d walk somewhere nearby for lunch. And in the evenings, we would wander the city in search of supper and finally head back to the hotel. On the city streets is where I experienced sensory overload. Beijing is lively, with bright lights and unfamiliar sounds, smells, and tastes. There’s 18 million people bustling to and fro, on foot, on bicycles and in cars. It’s a lot to soak in, especially if you’re trying not to get hit by a bus.
I’d be remiss if I did not mention here that the Asian ladies, dressed in their smart city styles, are especially interesting to watch.
Total sensory overload.
If you’ve ever seen the movie “Lost in Translation”, my week in China felt a little bit like that movie. Sofia Coppola does a great job of capturing that intoxication that comes from a mixture of jet lag, not understanding the surrounding spoken language, and bedazzlement from the strange and alluring scenery surrounding the traveller.
Overall, my trip to Beijing was a blast. And I hear that our lab trial went very well!